

Lillie is the Keeper 1.5 is now available for iPhone & iPad!
App Store (iPhone & iPad)

Cinematic/tech artist & filmmaker. Online since 1999.
Lillie is the Keeper 1.5 is now available for iPhone & iPad!
App Store (iPhone & iPad)
It’s been a long day. With respect to the feelings of many people I care about, Trump is not a win for America. You may not think so, but I’ve been listening to you all along. I’ve been listening, but you haven’t fulfilled your end of the bargain—you’ve neither listened, nor had anything much to say.
There’s been no “smear campaign:” We’ve only taken Trump at his true, in-context, and utterly un-American word. You “feel” that the economy was better under him, while the numbers call it a wash. You believe that crime is rising where it’s falling. The border is such a major issue for you, but when Republicans killed the bill that was everything you wanted because Trump wanted to, quote, “run on immigration,” you didn’t bat an eyelash. You fail to hold Trump to any standards, and while you’ll privately oppose many of his and his cronies’ policies (tax cuts for the rich, money in politics, unfettered corporate power, healthcare, contraception, Ukraine, etc.) you don’t speak out. You won’t speak out. And it’s only going to get harder.
If the last decade has taught us all nothing else, it’s that all expectations are off. The guardrails do not hold. Polling doesn’t work anymore. Reporting doesn’t work anymore. Only bold repetition seems to break through, and that is an idea whose master we do not wish to acknowledge.
We treat America’s democracy as a thing carved in stone, rather than a gentle flower we must guard. Democracy is a burden, which is why it’s been allowed to fail in so many places, already, in this young century. It’s our burden. But when we allow the information space to, as Steve Bannon recommended, “fill with shit,” we shirk our duties as citizens. And no amount of projection and finger-pointing can overcome the tarnish on your intellectual honor from believing only what you want to believe.
Trump can’t stop lying. He’s in too deep. But whatever of his policies you support, you must not play along. That way lies nothing of honor, value, bravery, or love.
***
These were my thoughts Wednesday, the day after Donald Trump was elected to a second term as U.S. President. They’re messy, but they’re honest.
There is something important I left out, though. I won’t waste your time with paragraph after paragraph. It’s this: Social progress is not zero-sum. Putting in “the leaf” doesn’t make your place at the table any smaller. (And the good man must then ask: What if it even did? What would that change?) Populists have been leading flocks astray with this dead meme for well over a century, that being concerned for someone who isn’t you means not being concerned for you. I have to wonder how small their hearts are. Whatever can be used to “other” one’s fellow man and pretend that they, uniquely, don’t matter, is fair game.
When shamed out, as they always are, they invert the play. They steal the language of those they’d marginalize. It’s the same premise. It’s childish. That someone else has suffered doesn’t imply that you haven’t. That your and your neighbor’s positions are precarious doesn’t mean that you need to find a way to fuck him out of whatever he’s got left.
We’re supposed to be One Nation, and we’ve elected a divider–a man whose chief talents are projection and insults. This is not baseball. Enjoy your truimph, but look forward to the hangover. Whoever won this election, America lost.
Hope and Memory have one daughter and her name is Art, and she has built her dwelling far from the desperate field where men hang out their garments upon forked boughs to be banners of battle. O beloved daughter of Hope and Memory, be with me for a little.
But they are linked together, so it has always seemed to me, by some mysterious comprehension: it is as if they had all been initiated into some ancient rite, inspired and framed by forces visible and invisible. The winter storms that batter the coast, the vernal spell of the spring, the hot, still summers, the season of rains and autumnal decay, have made a spell which, line by line, has been communicated to them, con- cerning the powers, evil and good, that rule the world, and manifest themselves in ways benignant or terrible . . .
Wow. 2011. That’s a long commitment. It was a DVD service then. My computer had a slotloader drive. They’d get just about anything you asked for, if you waited long enough.
Then they added streaming. That was fun.
Then they tried to split discs and streaming, and had to do a desperate volte-face.
Eventually, they dropped discs anyway.
Original productions. Some bad. Some great. Most average. Most expensive, until they weren’t. Three seasons of Dark, but 1899 only survived one. The streaming wars peaked. No one could burn money like they used to.
But they were profitable.
And, although profitable, they wanted more.
We all dropped cable, because it cost too much, and was full of loud ads and cheap garbage shows. Then the streamers all… wanted to make cable again.
But this time it’d be 100% vertically integrated. Watch it here, or don’t watch it at all. We hated that, but the suits loved it. Dark again… Dark had the best soundtrack of any tv show to date, but you couldn’t buy it. You had to build it your own damn self.
Rubbish.
Buy a great show, so you could watch it without internet? Forget it.
Rubbish.
And that’s the world–that’s the market Netflix gave us.
They make more per customer if they show us ads. So why not jack the prices up? Again, and again, and again… Finally, they were going to switch us automatically to an ads plan. Or charge more for the same thing. No, not worth it.
2011. Damn. But, money only understands money. Getting it, or losing it.
FAFO.
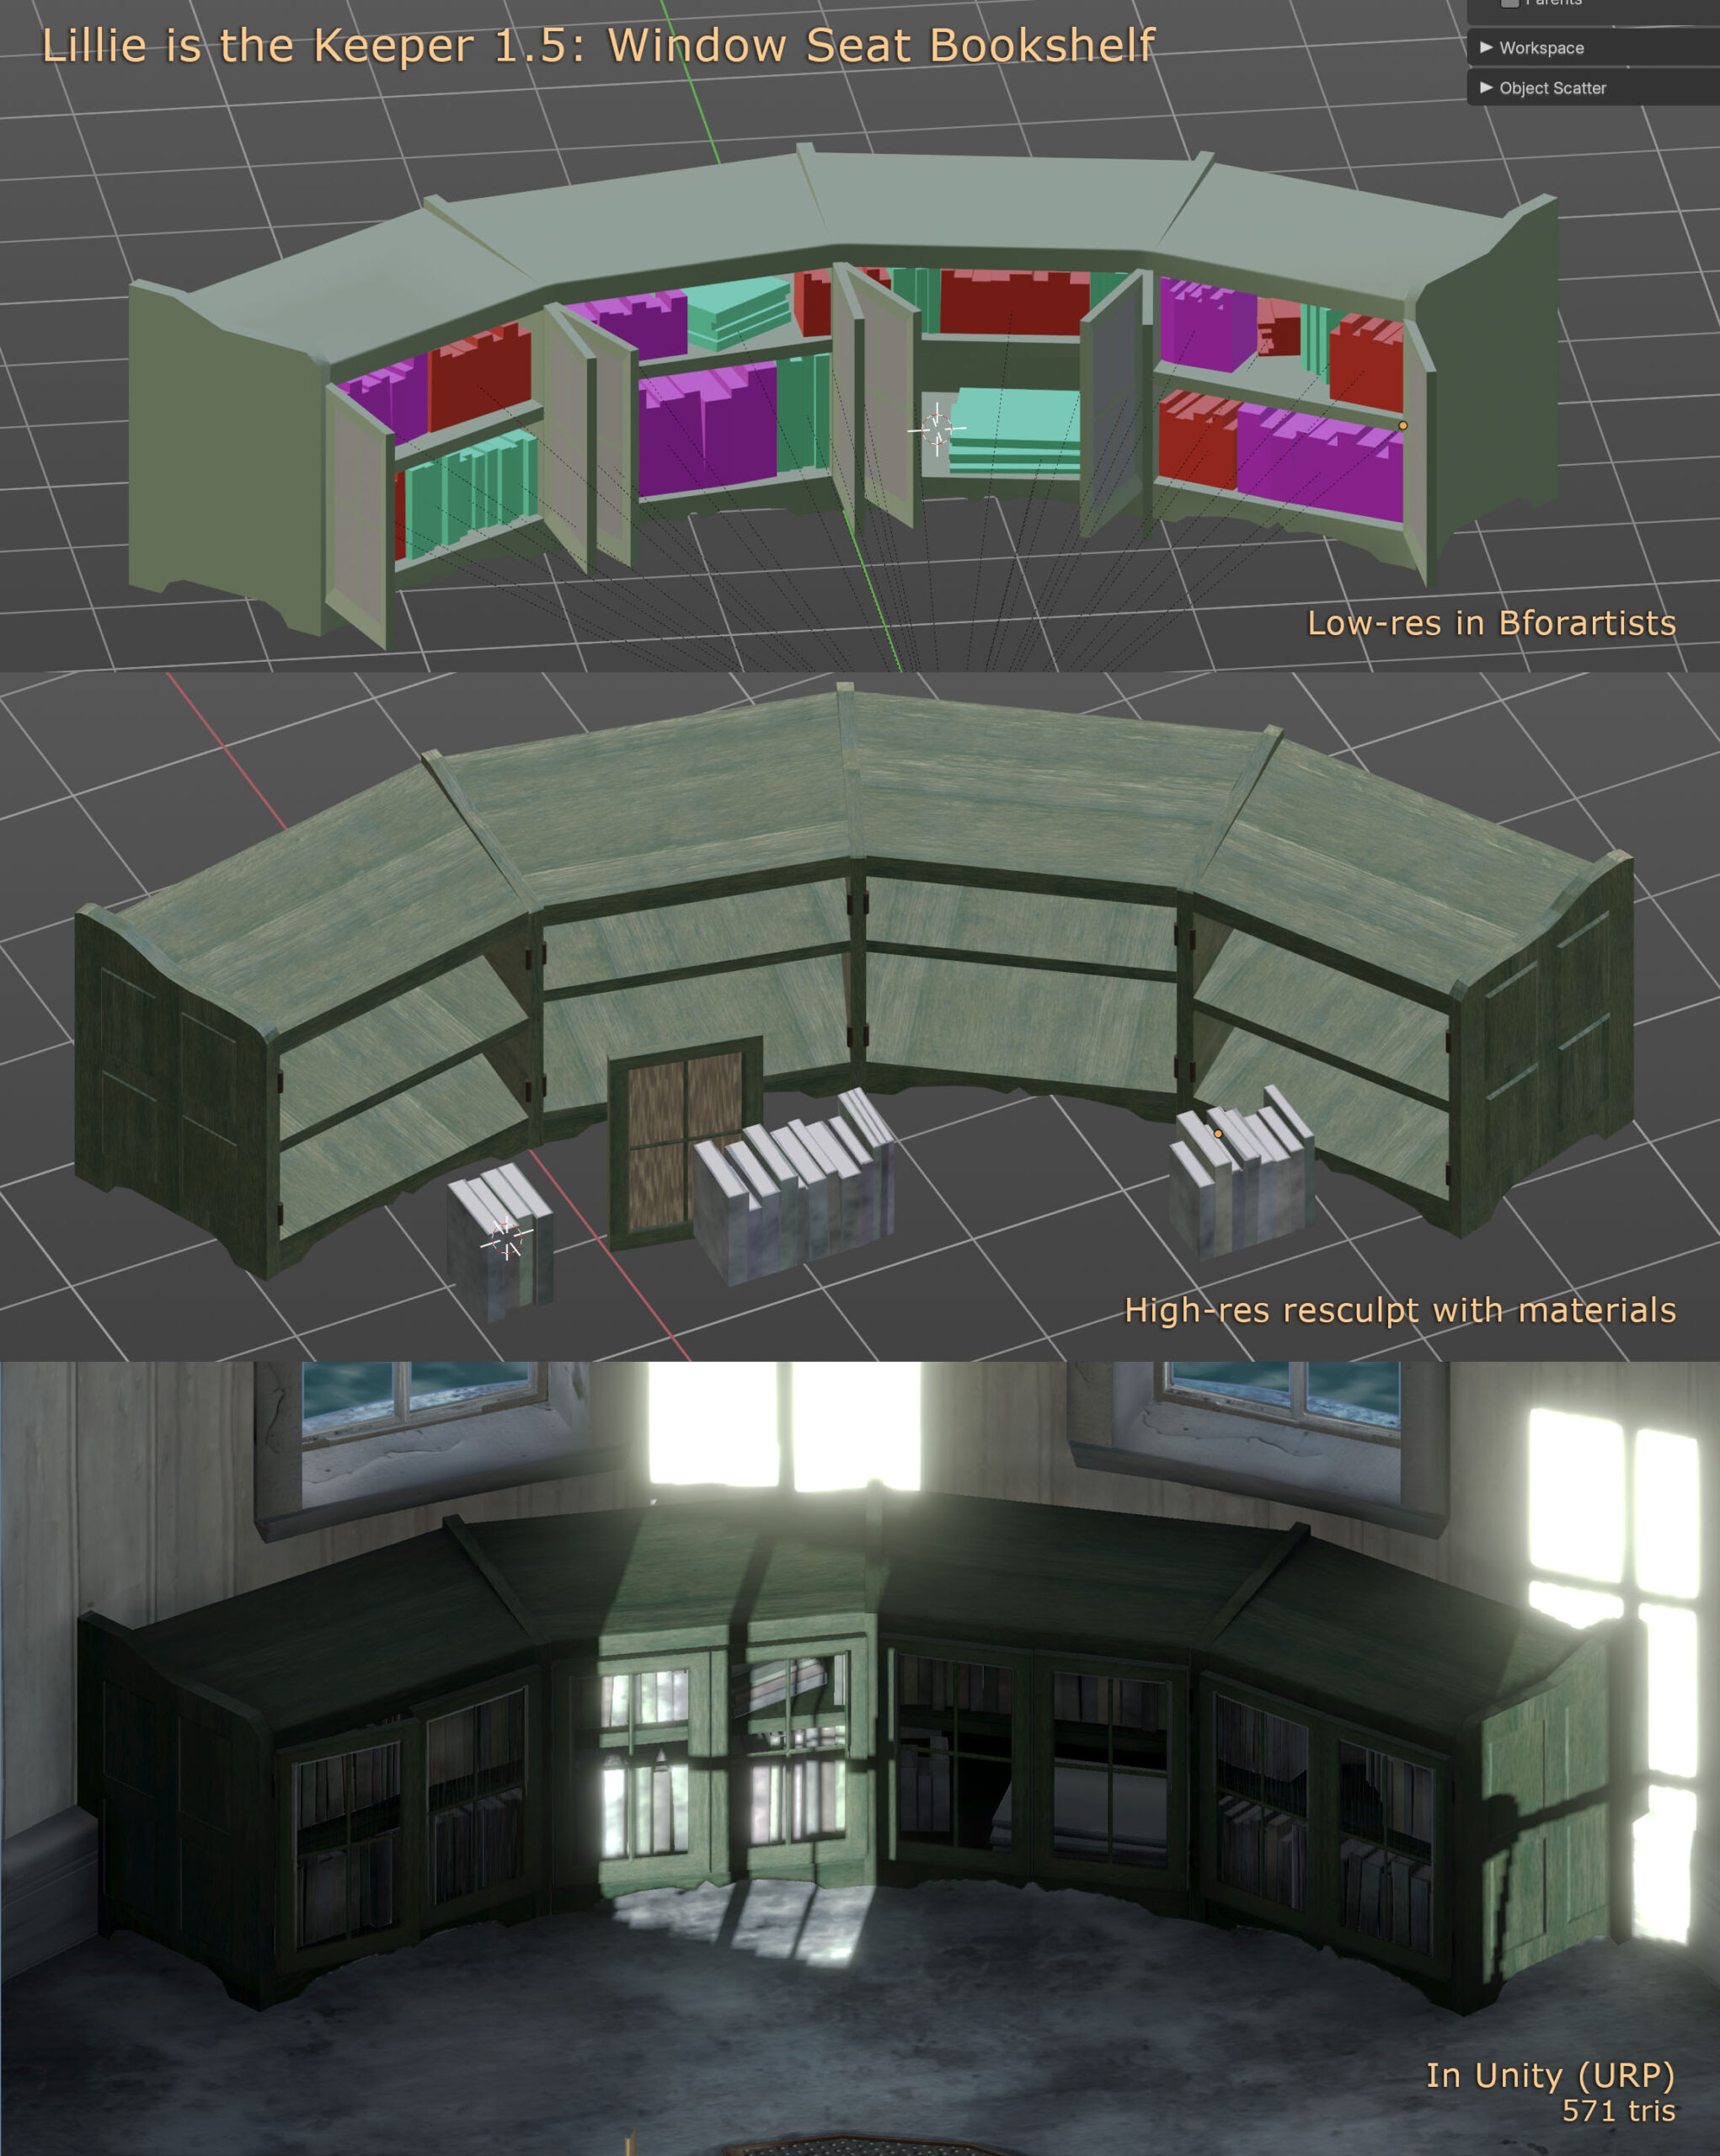
The biggest update ever! Besides the lovely new Watch Room models blogged previously, please enjoy:
All this and it’s free through September 9! Grab your copy — and be sure to give it a star rating on the App Store. (It takes 3 seconds, and really makes a difference with search visibility.)
This was supposed to be a quick, low-detail item. But it looked too much like a tv shelf. Two days later…
The everything-is-hand-modelled marathon continues with an assortment of new chairs, cleats, rings, hooks, rain gear, ropes and more. Look for Lillie is the Keeper 1.5 later this week, if all goes well.
1.5 will be titled “Secrets.” You’ll find out why.
It’s a good album. It’s a good reunion. But I’m not sure it’s a good Sneaker Pimps reunion album.
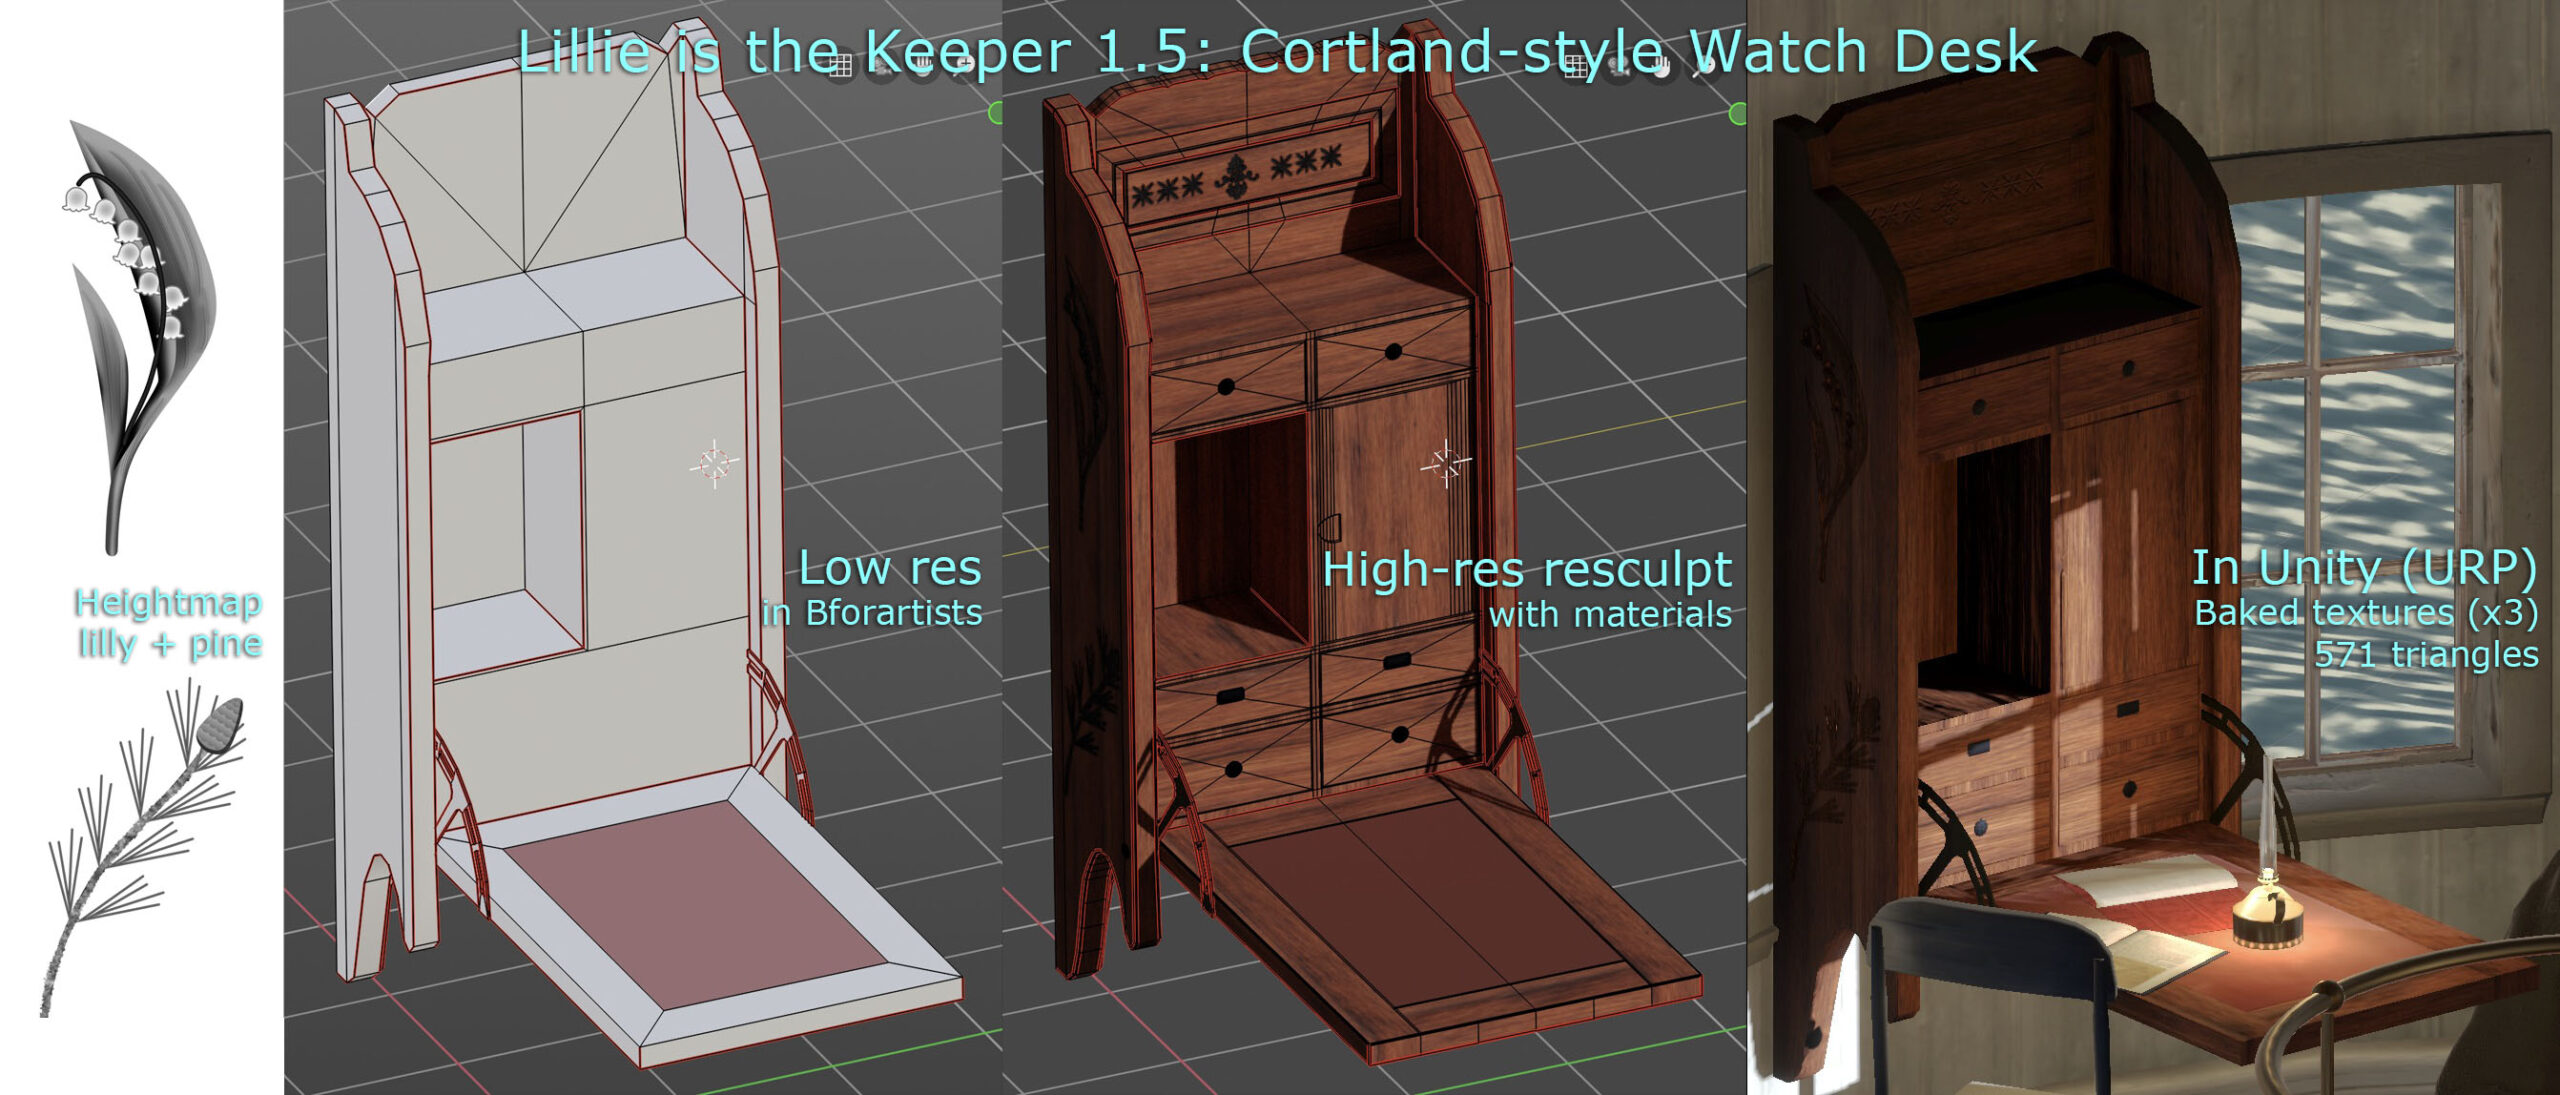
Stealing a bit of time to work on the next release of Lillie is the Keeper. I always wanted some sort of hero wall-mounted desk in the watch room (top floor, beneath the lantern). It’s rather a hub, as far as the game is concerned.
The design is inspired by a Victorian-era Cortland desk.
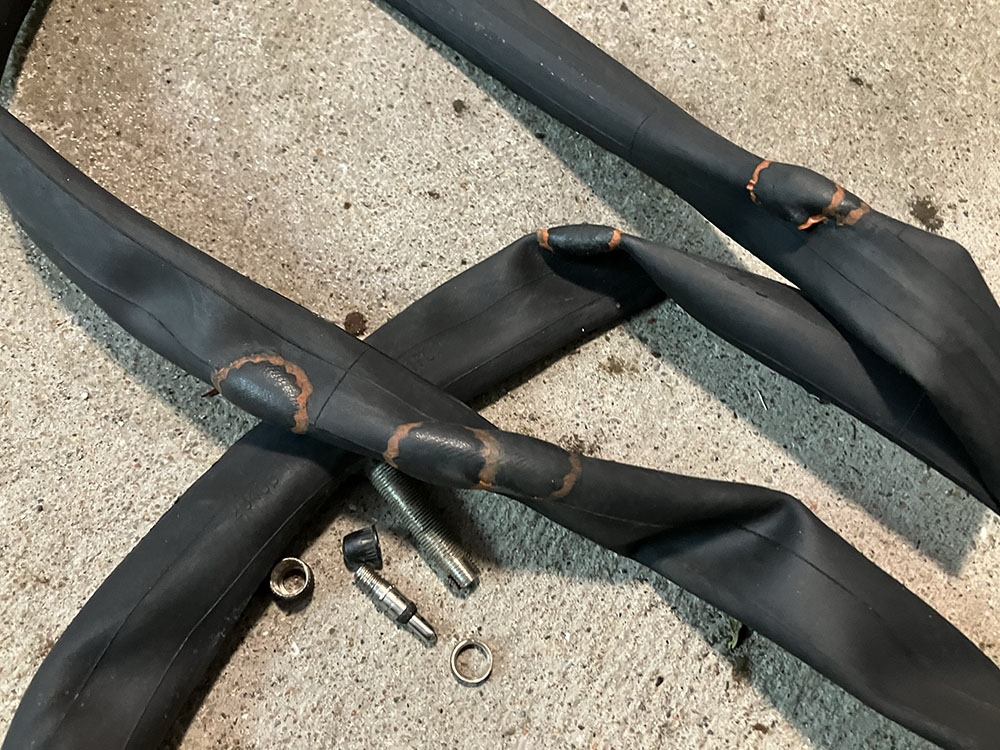
Should’ve gone for seven patches.
Got this absolute classic running in SheepShaver. Nostalgia overload.