The biggest update ever! Besides the lovely new Watch Room models blogged previously, please enjoy:
Three new secrets to uncover
New, streamlined AR setup
Revamped models & textures
Graphics, audio and performance improvements throughout
All this and it’s free through September 9! Grab your copy — and be sure to give it a star rating on the App Store. (It takes 3 seconds, and really makes a difference with search visibility.)
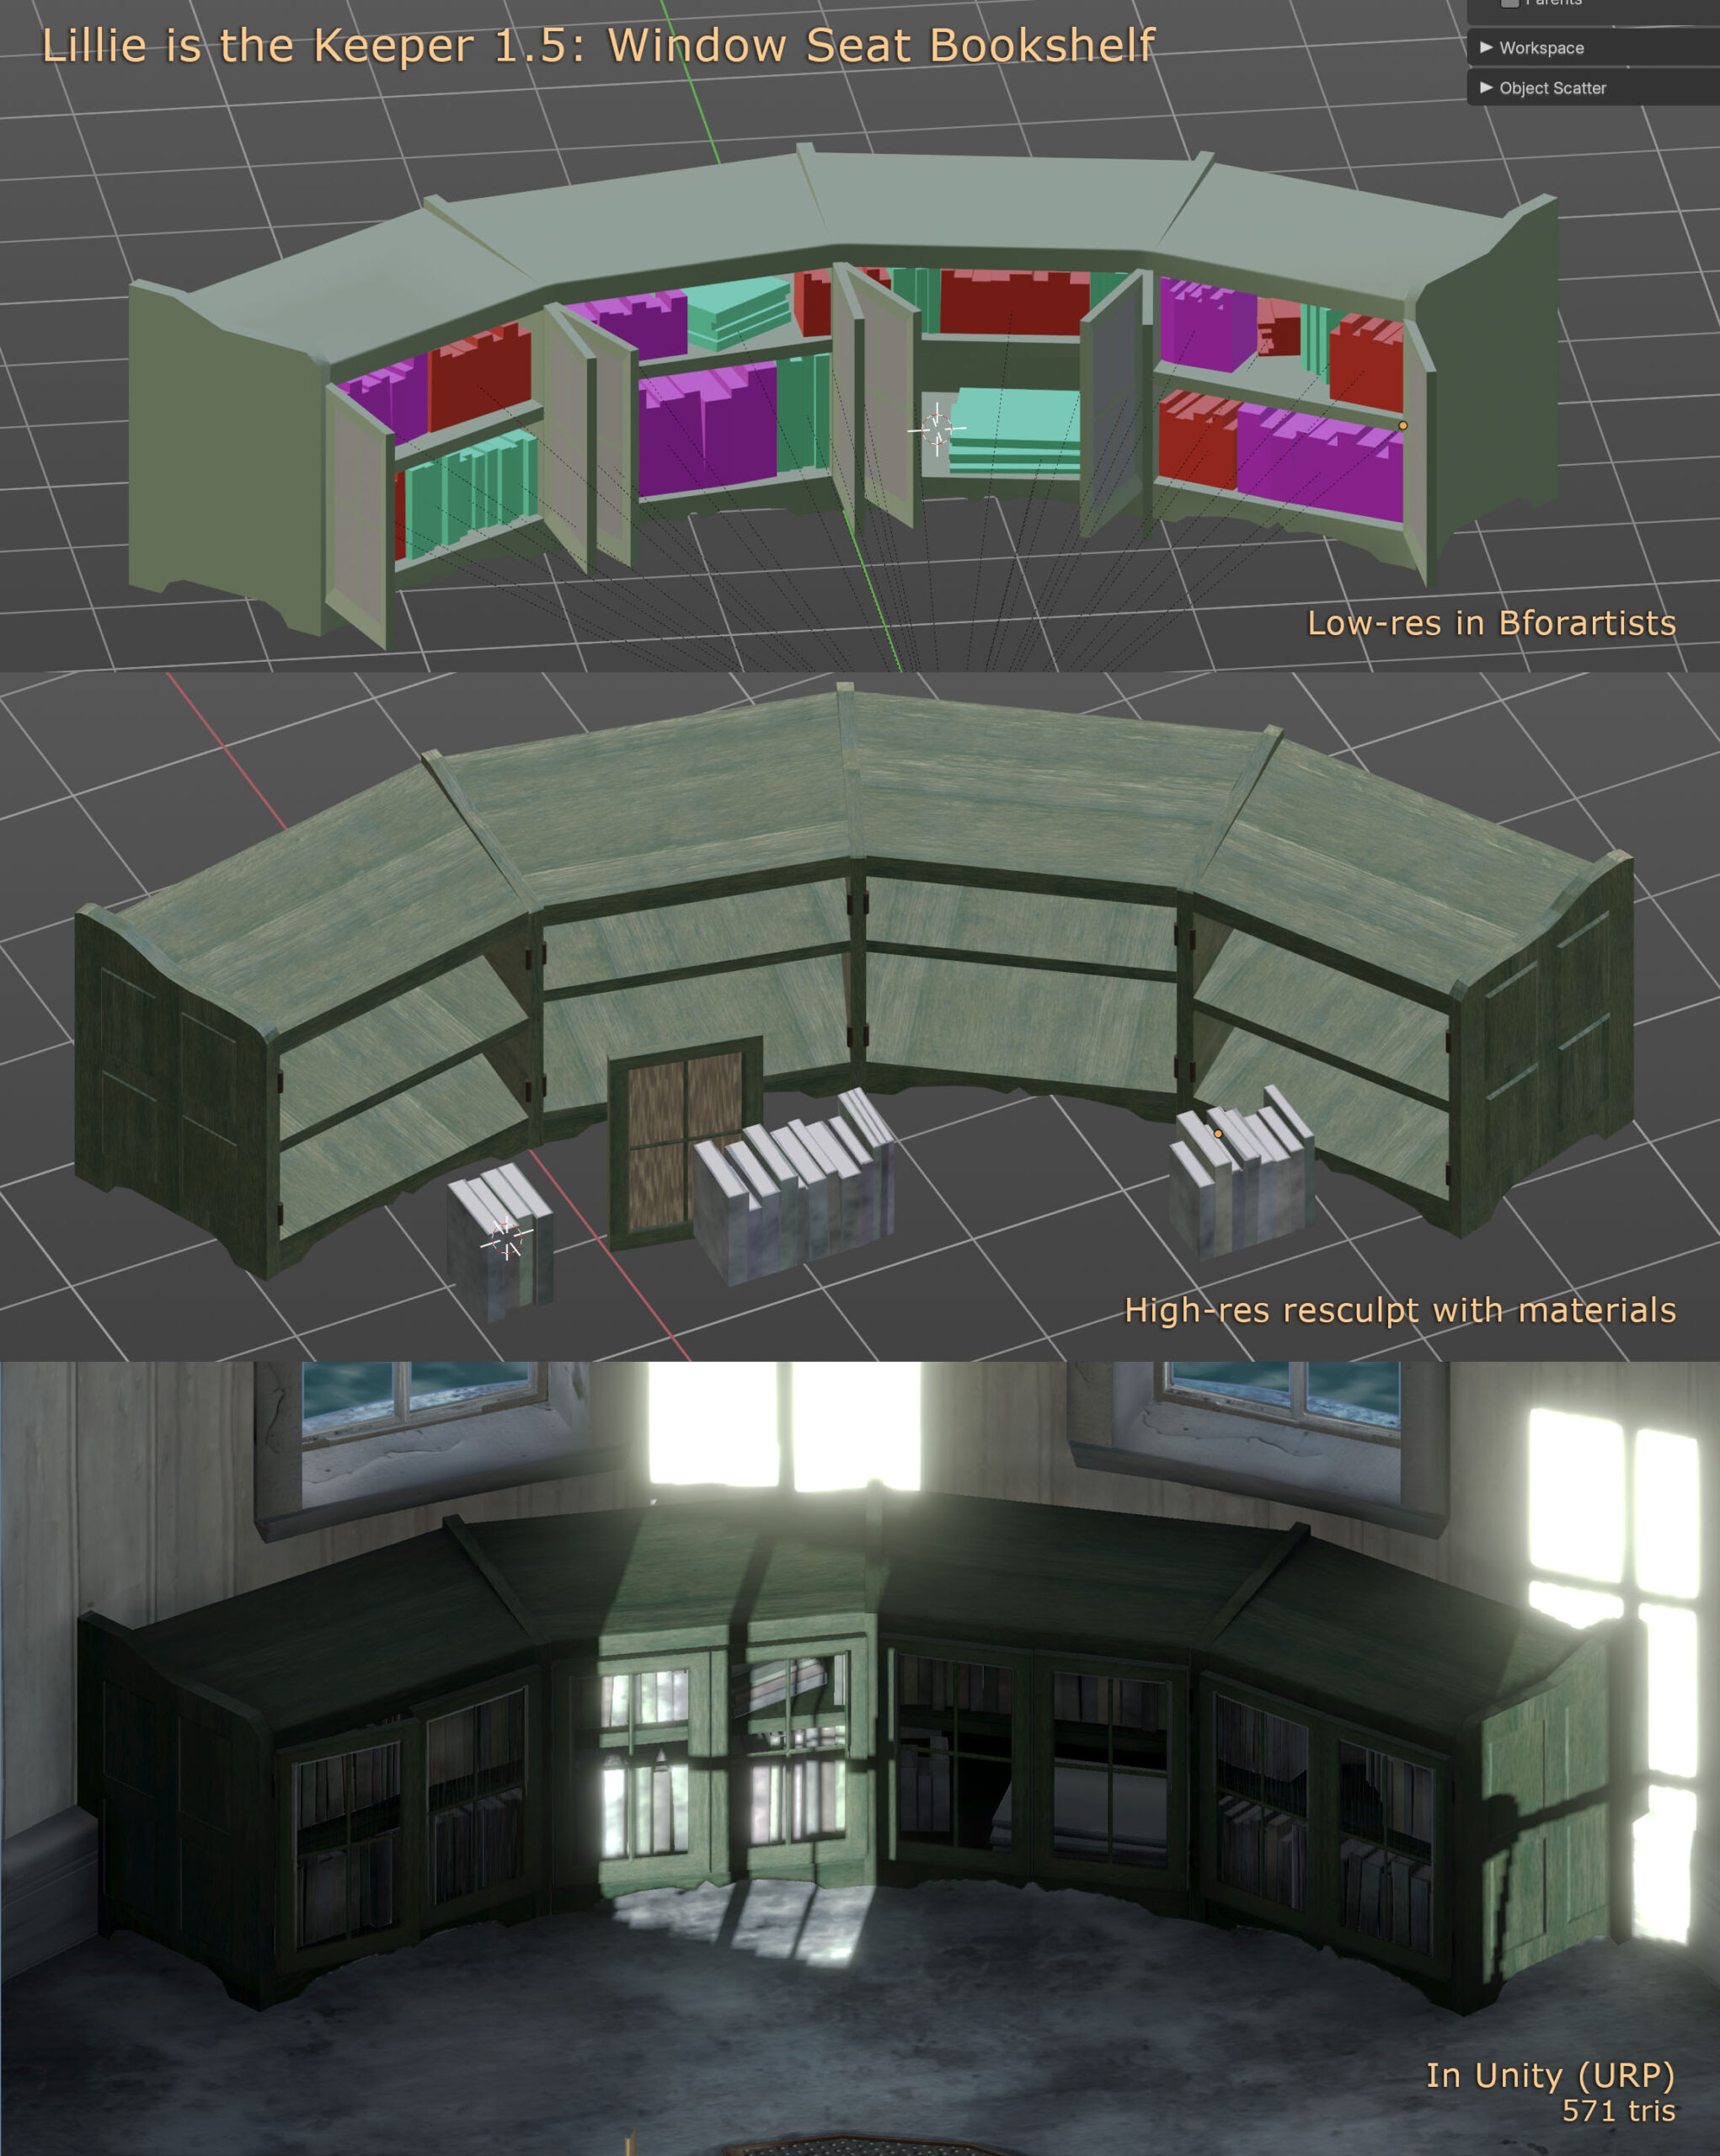
This was supposed to be a quick, low-detail item. But it looked too much like a tv shelf. Two days later…
Build process for the new Watch Room bookcase in Lillie is the Keeper v1.5.
The everything-is-hand-modelled marathon continues with an assortment of new chairs, cleats, rings, hooks, rain gear, ropes and more. Look for Lillie is the Keeper 1.5 later this week, if all goes well.
1.5 will be titled “Secrets.” You’ll find out why.
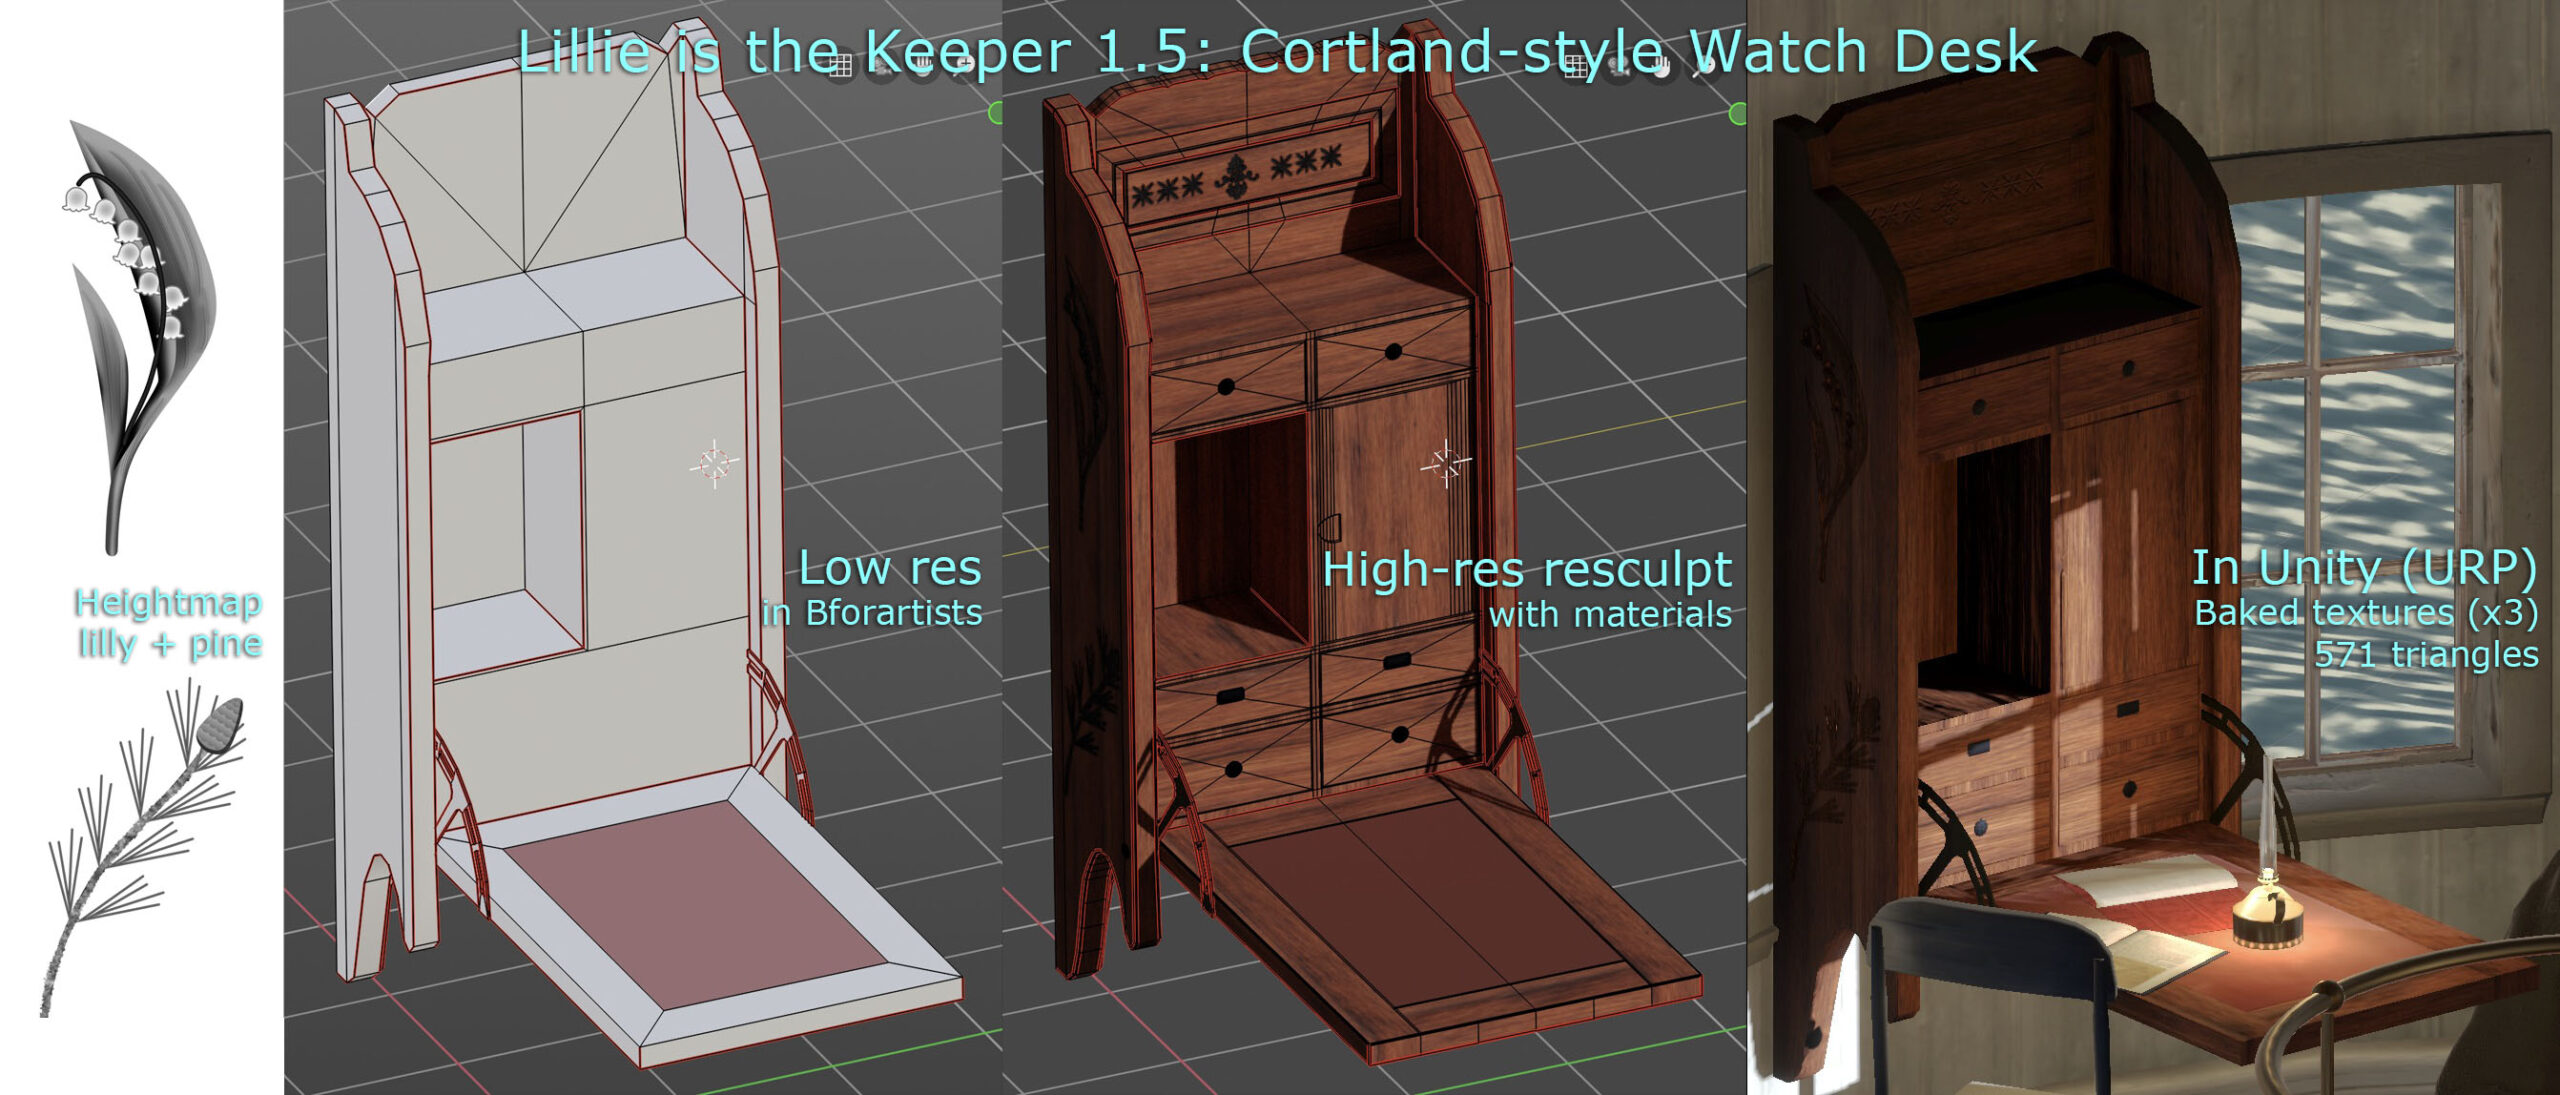
Build process for the new watch room desk in Lillie is the Keeper 1.5
Stealing a bit of time to work on the next release of Lillie is the Keeper. I always wanted some sort of hero wall-mounted desk in the watch room (top floor, beneath the lantern). It’s rather a hub, as far as the game is concerned.
The design is inspired by a Victorian-era Cortland desk.
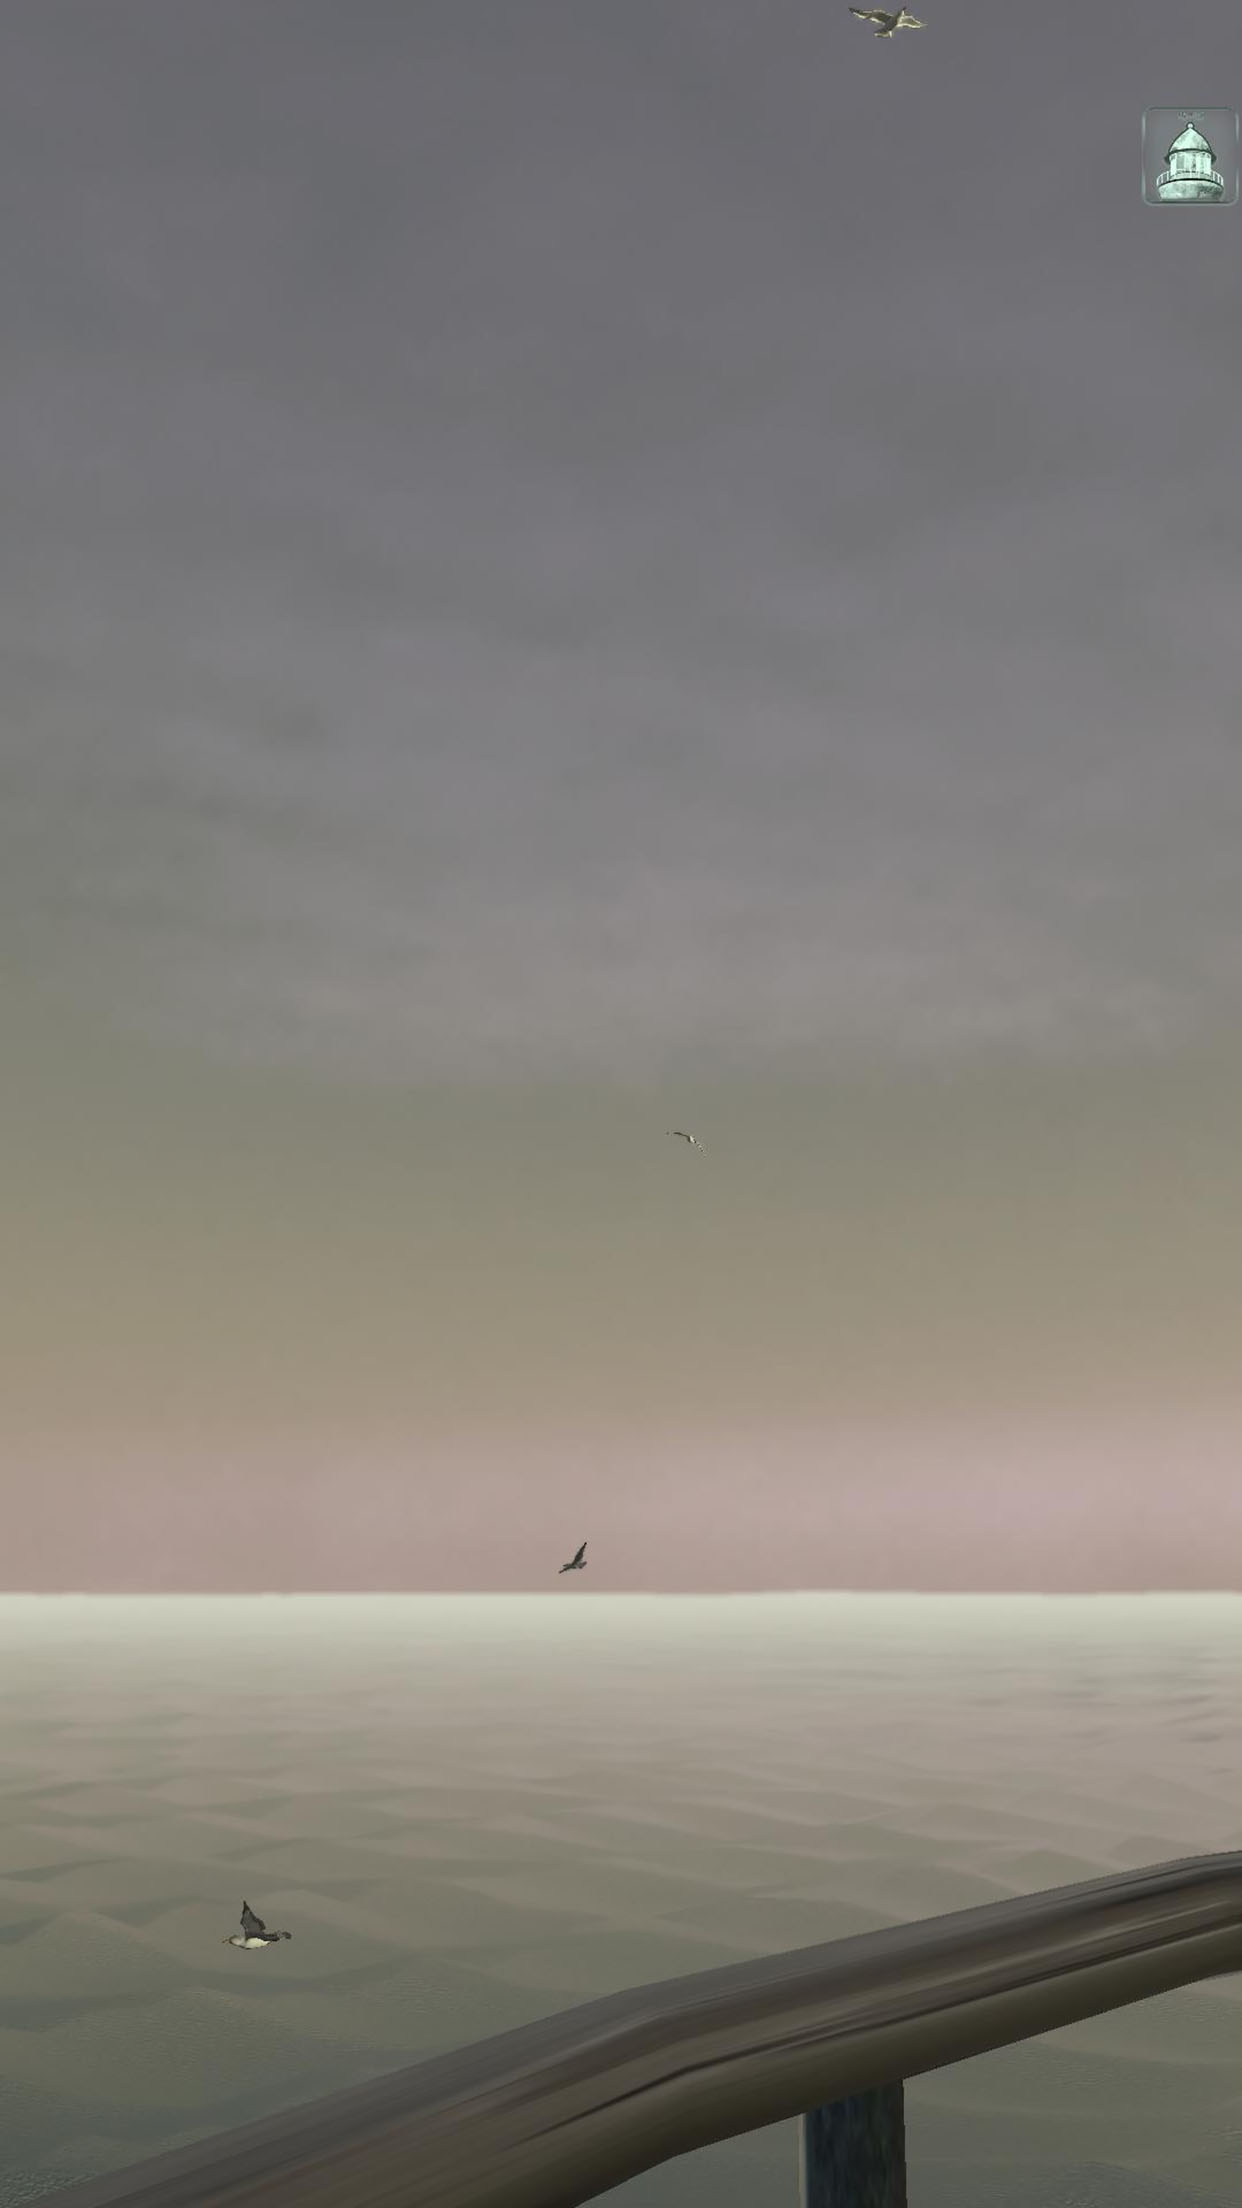
Each level of “Lillie is the Keeper” features a unique high-definition skybox texture. These Unity cubemaps are rendered in Bforartists, the UI-focused fork of Blender. Here’s how you can create your own.
Create a new scene in Bforartists, and switch the Render Engine to Cycles (camera icon: Render Engine). Add a single Directional Light, to act as the sun. Model a gently curving lenticular piece of geometry, about 5 km in radius, to act as the ground/ocean, and texture it appropriately.
If you’re interested in accuracy, you can enable an add-on called Sun Position to set your sun angle for the date, time, latitude and longitude of your game scene (Preferences menu: Add-ons: Lighting: Sun Position).
Switch to the Shading tab, and select the World (background) shader. Create a Sky Texture node. Set it to Preetham, and link its output to the World Output node’s Surface input.
Clouds
Next, model your clouds (as ordinary geometry) in rough form. Hide them from rendering. Create a Volume object (Add menu: Volume: Empty). Go to the Volume’s Modifiers tab (wrench icon), and add a Mesh to Volume modifier. Set the Modifier’s Object to your hidden cloud geometry object. What you’ll get is a Minecraft-like blocky cloud. Increase the Voxel Amount to reduce this blockiness somewhat–try 1024.
To fully remove the blockiness and get cloudier edges, go back to the Modifiers tab, and add a Volume Displace modifier. Go to the Texture tab (checkerboard icon). Create a new texture, and set its type to Clouds. Go back to your Modifiers, and assign the cloud texture to your Volume Displace modifier. Adjust the Texture and Modifier settings until you like the results.
Go to the Material tab (crash test dummy head icon), create a new material, and assign it the Principled Volume shader. Adjust the material properties to your desired cloud appearance. (This can take a while. Start with a Density of .001-.005. You’re welcome.)
Rendering
Finally, set up your camera to render the six faces of the cubemap. In the Data tab (camera icon) set the Field of View to 90 degrees. In the Output tab (printer icon) set the Resolution to a power-of-two square, like 1024 or 2048. Set the Frame Range to 0-5. Select a folder and filename to render to, setting the File Format to OpenEXR (.exr), in order to save HDR color values. Go to the Animation tab, and animate your camera to be rotated as follows on frames 0-5 (x,y,z):
0: 90, 0, 270
1: 90, 0, 90
2: 180, 0, 0
3: 0, 0, 0
4: 90, 0, 0
5: 90, 0, 180
Render all six frames (Render menu: Render Animation). This would be a good time to take a walk around the block. Notice the blackbirds.
Building the Skybox
When you get the renders looking how you want, open your frames in an image editor and arrange them in one big vertical strip. Frame 0 should be at the top, and 5 at the bottom. Save this, again, as an OpenEXR file.
In Unity, import the strip image. Click on the texture to see its Import Settings in the Inspector. Set the Texture Type to Default, the Texture Shape to Cube, and check Fixup Edge Seams.
Finally, create a material. Set the Shader to Skybox/Cubemap, and under Cubemap (HDR), select your texture. In your Scene, open the Lighting panel (Window menu: Rendering: Lighting). Click the Environment tab, and assign your material to Skybox Material.
Bonus
Download my .blend file for LitK level 5: Light right here.
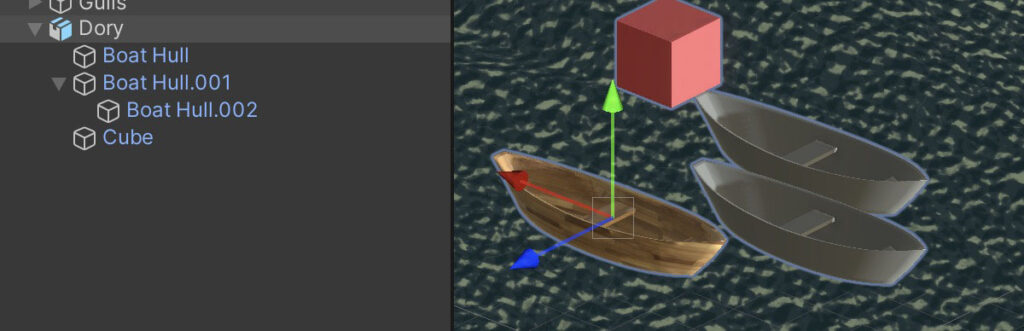
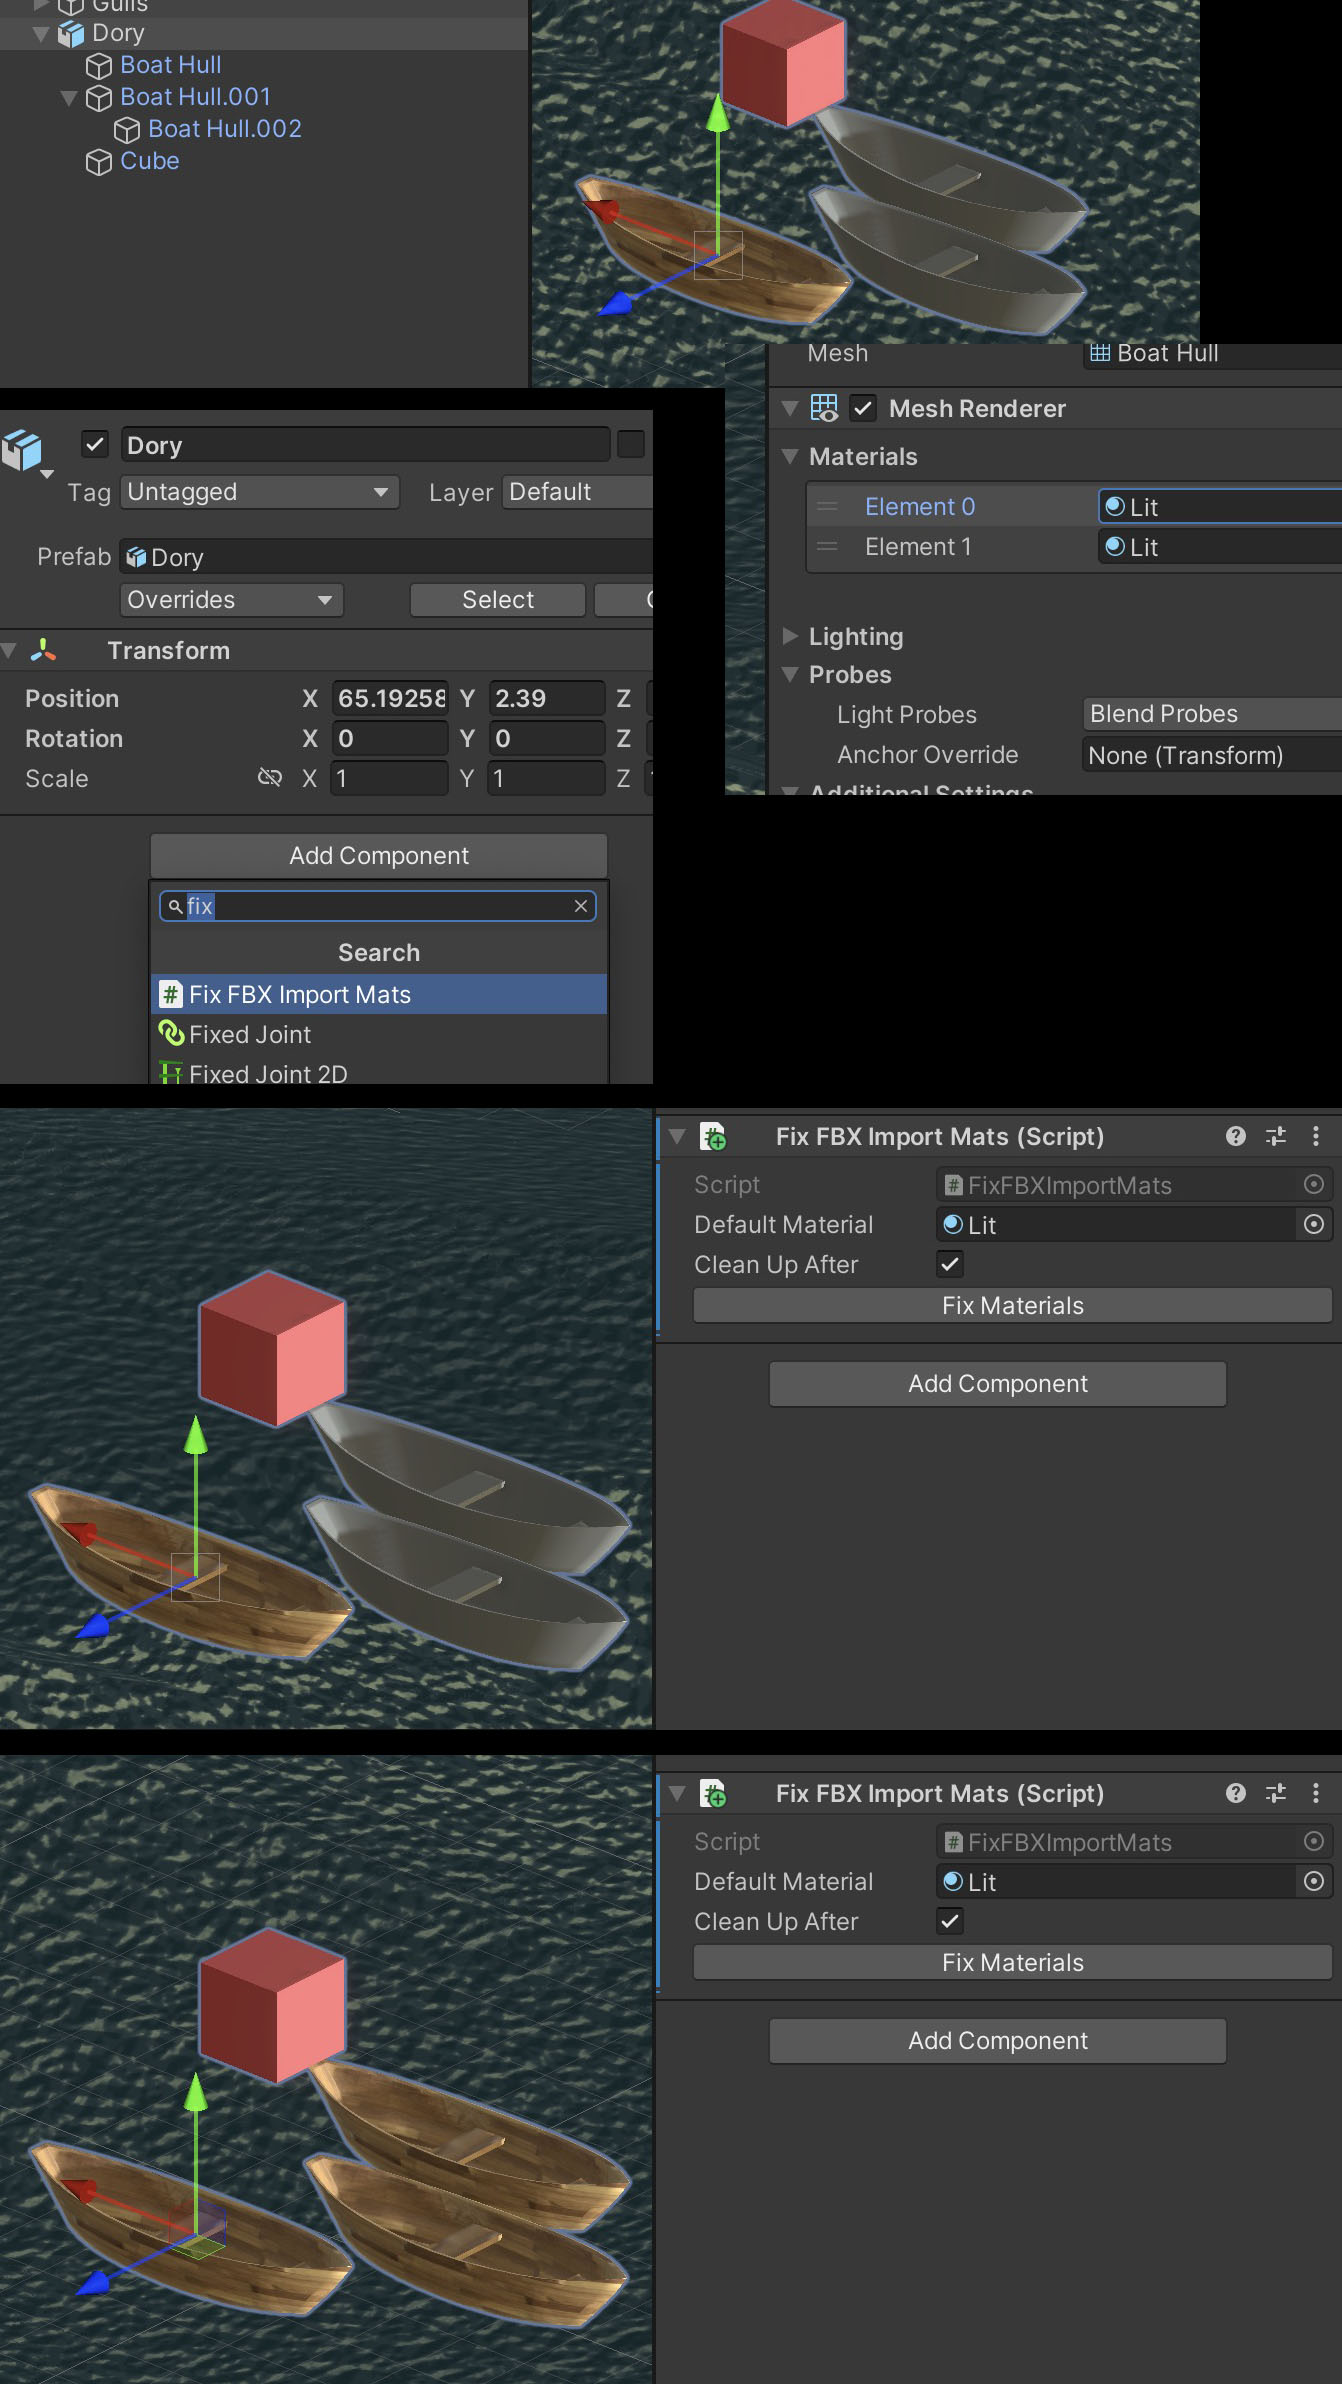
There’s a bug in the FBX exporter for Blender 3.x (and now 4.x) that doesn’t export materials on instanced meshes. While the original mesh imports into Unity just fine (and remaps materials correctly under the importer’s Materials tab) duplicate instances of the same mesh import with only the default Lit material. If you’re (perhaps oldschool) like me, and use a lot of instancing to save disk space, this is a problem.
It supports Undo, regular and skinned meshes, and will walk down the hierarchy as far as it needs to. Can take a few seconds to grind through big hierarchies. Works on my ultra-complex Lighthouse prefab, and all the others I’ve thus far thrown at it. If you find a bug, let me know!
Here’s how to use it:
Download & unzip the files.
Add FixFBXImportMatsUI.cs to your project’s Editor folder. (If your project doesn’t currently have one, add a folder named “Editor” to your Assets folder.)
Add FixFBXImportMats.cs to your project, wherever makes the most sense.
After importing an FBX with missing Materials, open the Prefab or drag it into a Scene, and add a FixFBXImportMats Component to the root of the import’s hierarchy.
Assign the Default Material you need replaced to the Component’s slot.
The default Material will vary depending on your render pipeline and import settings.
If using URP, it’s usually the Lit material, located in Packages: Universal RP: Runtime: Materials.
A quick way to find it is the select an instanced mesh in the hierarchy, and click on the Material shown in the Editor.
Leave Clean Up After checked to have the Component remove itself after running.
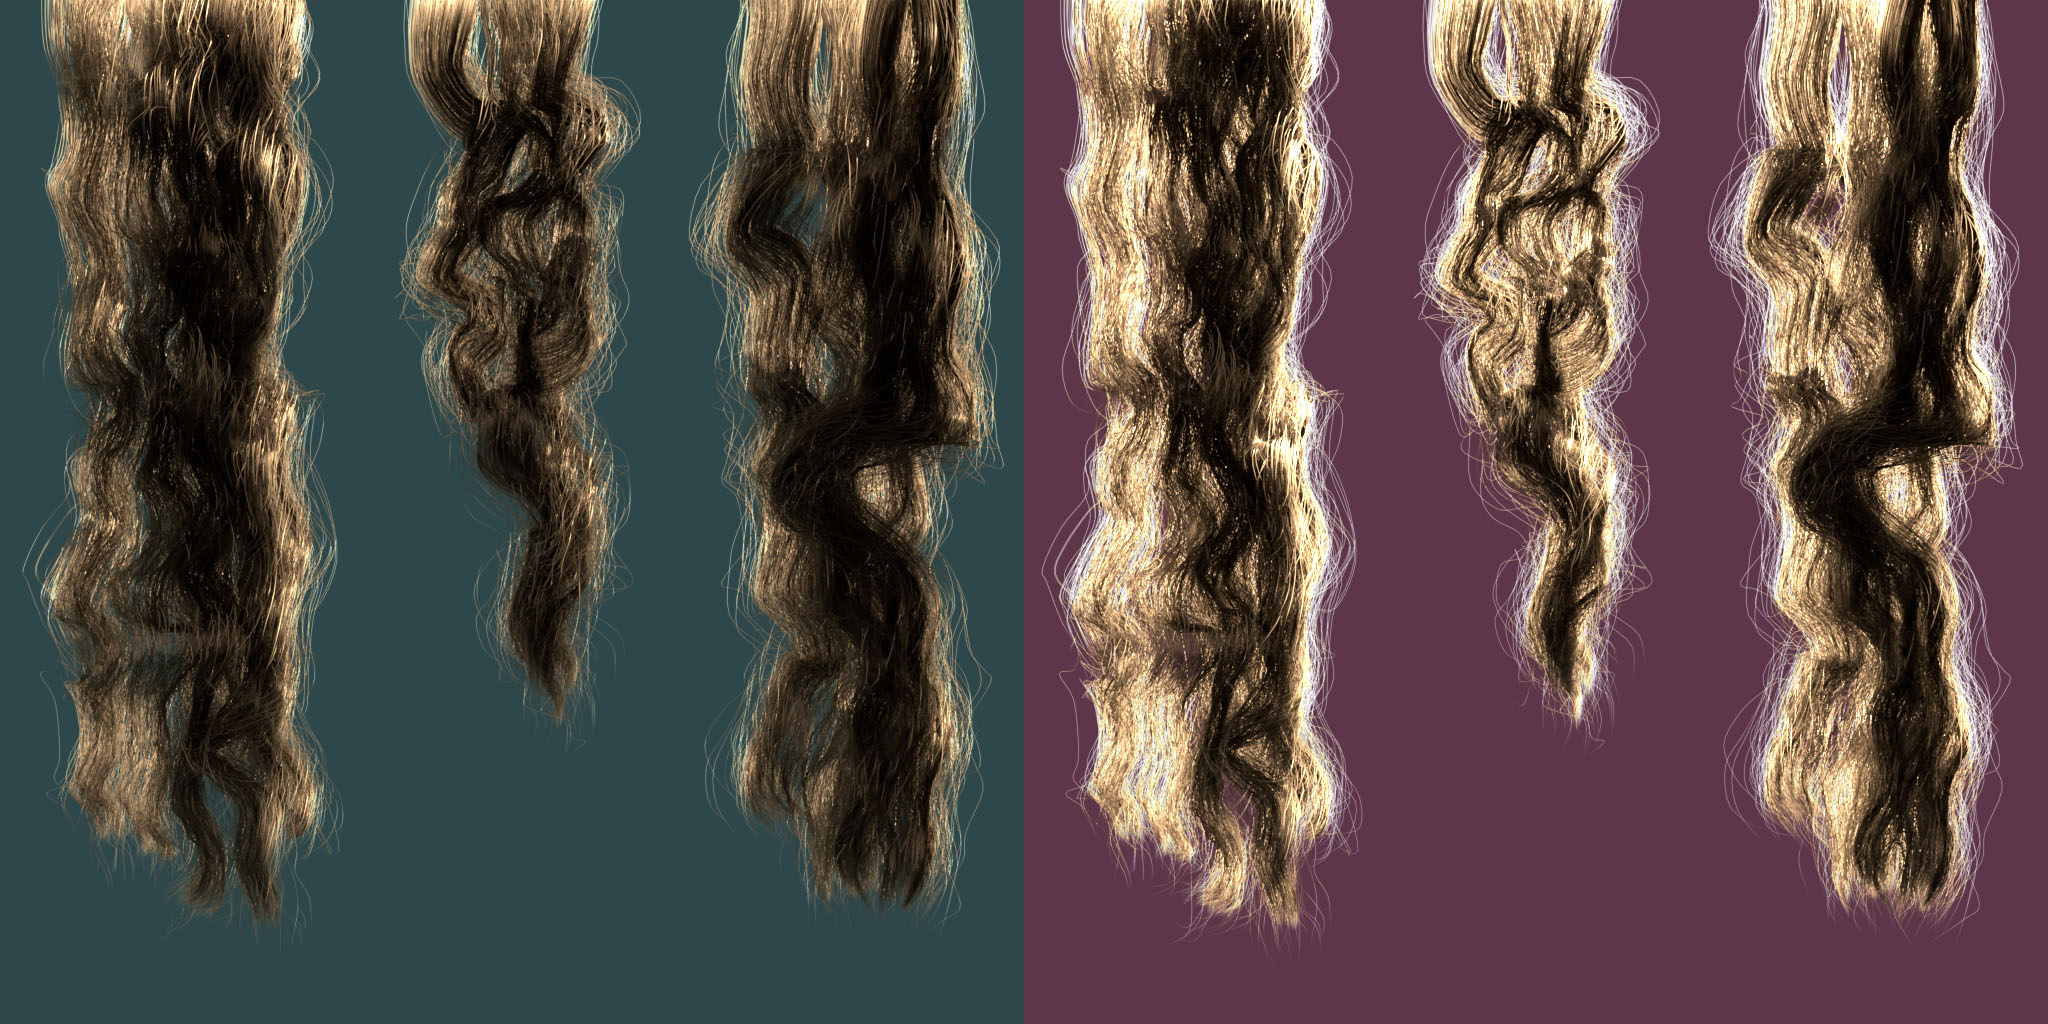
In LitK, Lillie’s messy hair becomes visible when you don’t have look-around control. (I’m bored with letterboxed cutscenes.) The original hair textures were hand-painted, before “rounded realism” really took shape. There’s a realtime hair package in Unity, but it’s heavy for iOS devices. I decided to try rendering out some more realistic textures in BForArtists (Blender).
How does a gen-x-lennial go about learning a new tool? Try to find the one non-video tutorial Google still indexes. Skim it. Dive in. Check the documentation. Get something you’re reasonably happy with. Junk it, and start over from scratch. Get something maybe actually useable. Tweak it until you run out of time.
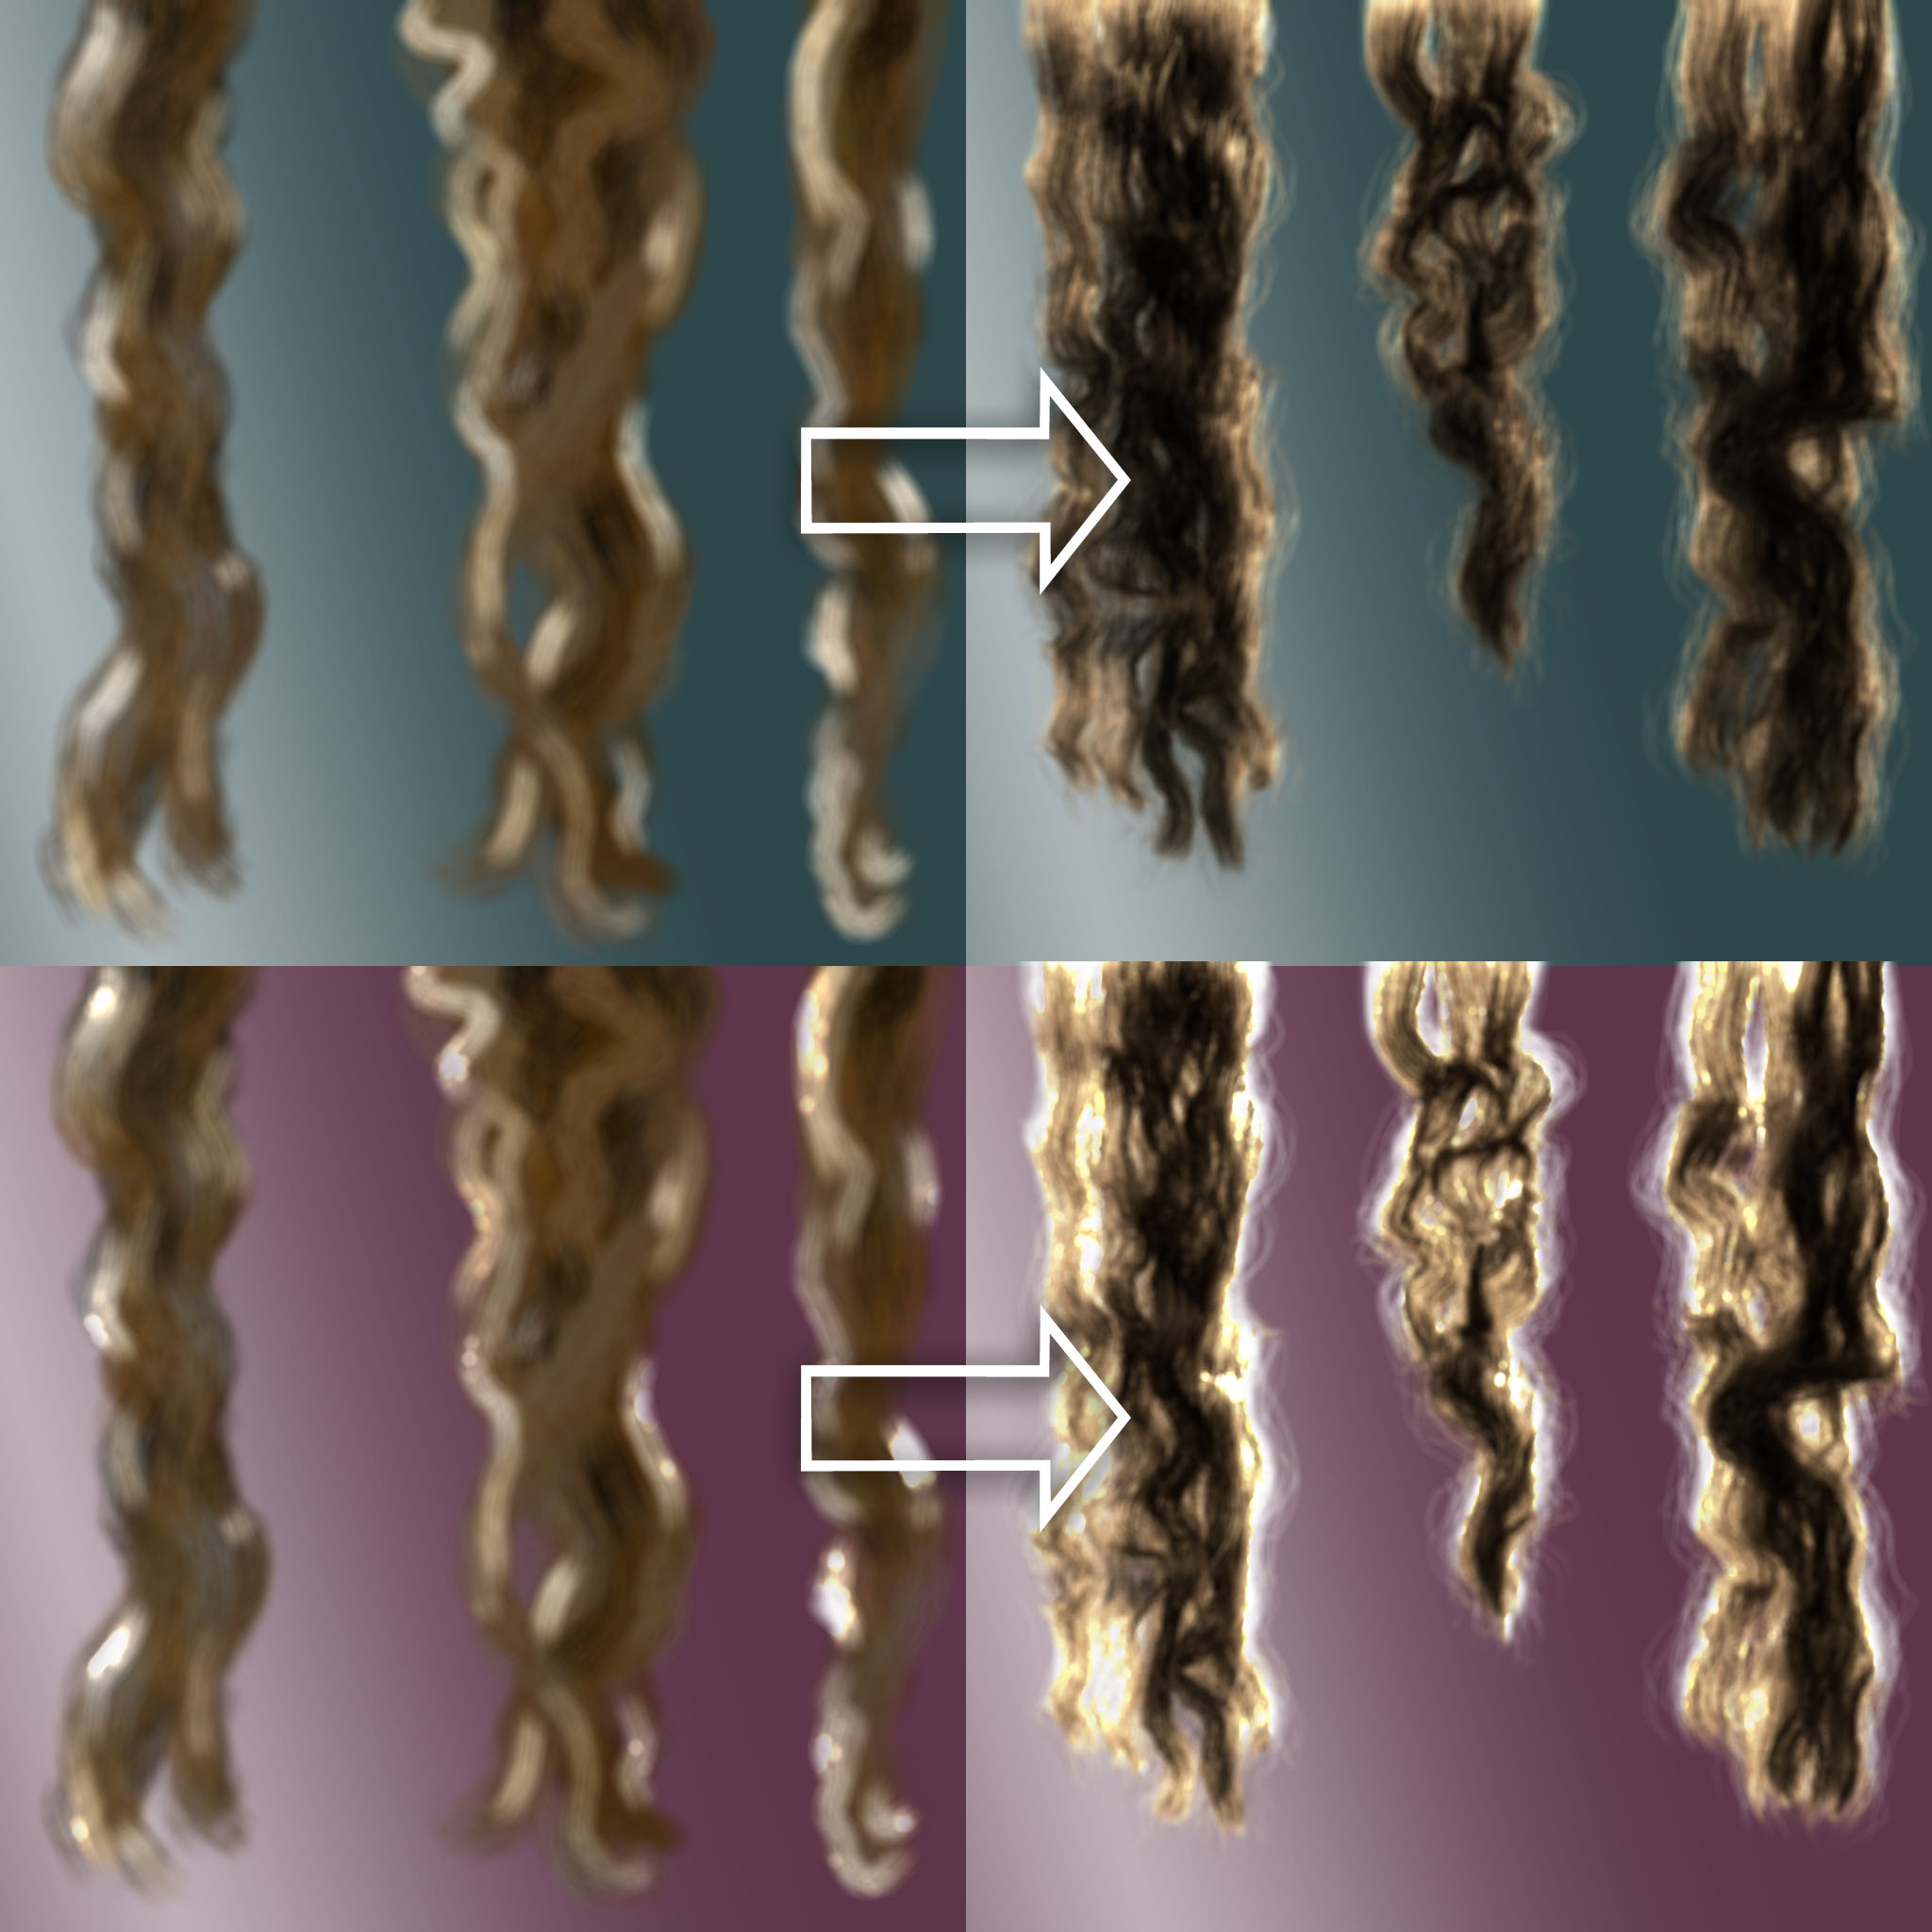
The results aren’t bad:
Then, defocused in Photoshop:
The Cycles renderer and Principled Hair (Transmissive) shader work together nicely. The tweaking options could use some love. (WTF does “shape” of a noise function mean?) Always use the BForArtists manual, not Blender’s.
“Lillie is the Keeper” 1.4 will bring many bigger improvements. We’ll look at those soon.
VFX Graph is Unity’s high performance pure-GPU particle effects system. I recently helped Chop Chop Games get a sizzle reel out for an upcoming card battler, which involved a fair amount of prerendered particle work in Apple Motion and Blackmagic Fusion. Looking at their competitors in the space, like Slay the Spire and personal favorite Black Book, got me tinkering again with VFX Graph.
It’s an impressive set of tools, but shader experience is definitely a prerequisite. You need to “think in GPU.” One great decision was making Animation Curves a first-class citizen in VFX Graph, allowing for a lot of nuanced per-channel animation. Getting particle motion properly punchy is always a challenge.
Shield Up uses two Animation Curves to Etch-a-Sketch the shield outline into being, then a mesh to fill the inside. The sparks are sub-emitted from invisible spawner particles.
Shield Loss uses a single, big flipbook-textured particle for the shield, with the burn line and ash lines animated with Animation Curves.
Vine Attack uses URP quad particles and particle strips with normal maps to fake some depth. It also uses a pair of useful subgraphs: Point Force and Orbit.
You can download these all in a .unitypackage here. The download also includes a couple of potentially useful subgraphs. Point Force can be positive, to push particles away from a given point, or negative, to suck them in. Orbit can also be positive or negative, to control the direction particles orbit around a center point.
Demonstration of the Point Force and Orbit subgraphs.