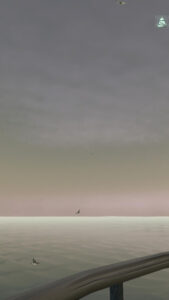
Each level of “Lillie is the Keeper” features a unique high-definition skybox texture. These Unity cubemaps are rendered in Bforartists, the UI-focused fork of Blender. Here’s how you can create your own.
Create a new scene in Bforartists, and switch the Render Engine to Cycles (camera icon: Render Engine). Add a single Directional Light, to act as the sun. Model a gently curving lenticular piece of geometry, about 5 km in radius, to act as the ground/ocean, and texture it appropriately.
If you’re interested in accuracy, you can enable an add-on called Sun Position to set your sun angle for the date, time, latitude and longitude of your game scene (Preferences menu: Add-ons: Lighting: Sun Position).
Switch to the Shading tab, and select the World (background) shader. Create a Sky Texture node. Set it to Preetham, and link its output to the World Output node’s Surface input.

Clouds
Next, model your clouds (as ordinary geometry) in rough form. Hide them from rendering. Create a Volume object (Add menu: Volume: Empty). Go to the Volume’s Modifiers tab (wrench icon), and add a Mesh to Volume modifier. Set the Modifier’s Object to your hidden cloud geometry object. What you’ll get is a Minecraft-like blocky cloud. Increase the Voxel Amount to reduce this blockiness somewhat–try 1024.
To fully remove the blockiness and get cloudier edges, go back to the Modifiers tab, and add a Volume Displace modifier. Go to the Texture tab (checkerboard icon). Create a new texture, and set its type to Clouds. Go back to your Modifiers, and assign the cloud texture to your Volume Displace modifier. Adjust the Texture and Modifier settings until you like the results.
Go to the Material tab (crash test dummy head icon), create a new material, and assign it the Principled Volume shader. Adjust the material properties to your desired cloud appearance. (This can take a while. Start with a Density of .001-.005. You’re welcome.)
Rendering
Finally, set up your camera to render the six faces of the cubemap. In the Data tab (camera icon) set the Field of View to 90 degrees. In the Output tab (printer icon) set the Resolution to a power-of-two square, like 1024 or 2048. Set the Frame Range to 0-5. Select a folder and filename to render to, setting the File Format to OpenEXR (.exr), in order to save HDR color values. Go to the Animation tab, and animate your camera to be rotated as follows on frames 0-5 (x,y,z):
- 0: 90, 0, 270
- 1: 90, 0, 90
- 2: 180, 0, 0
- 3: 0, 0, 0
- 4: 90, 0, 0
- 5: 90, 0, 180
Render all six frames (Render menu: Render Animation). This would be a good time to take a walk around the block. Notice the blackbirds.
Building the Skybox
When you get the renders looking how you want, open your frames in an image editor and arrange them in one big vertical strip. Frame 0 should be at the top, and 5 at the bottom. Save this, again, as an OpenEXR file.
In Unity, import the strip image. Click on the texture to see its Import Settings in the Inspector. Set the Texture Type to Default, the Texture Shape to Cube, and check Fixup Edge Seams.
Finally, create a material. Set the Shader to Skybox/Cubemap, and under Cubemap (HDR), select your texture. In your Scene, open the Lighting panel (Window menu: Rendering: Lighting). Click the Environment tab, and assign your material to Skybox Material.
Bonus
Download my .blend file for LitK level 5: Light right here.


