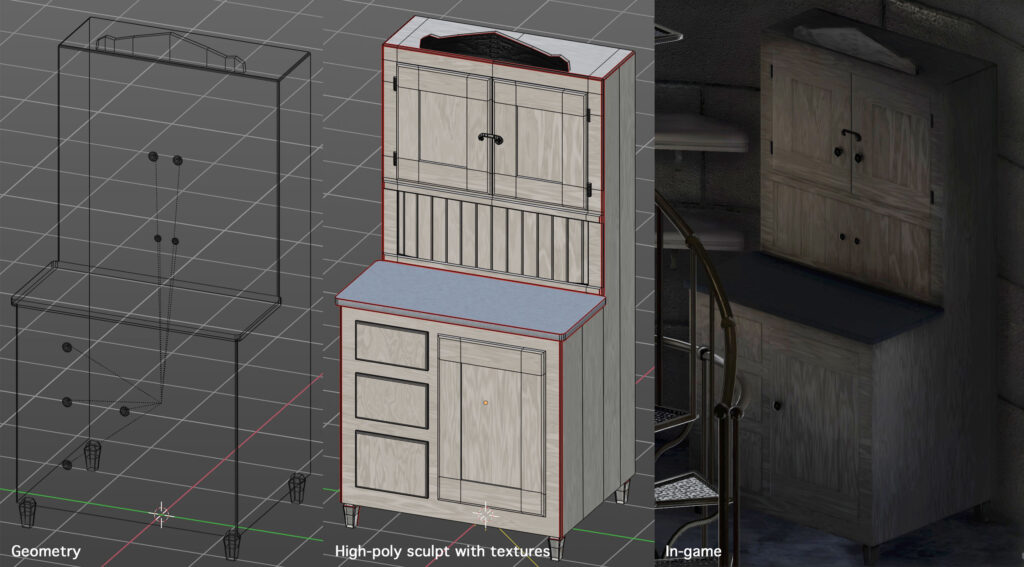
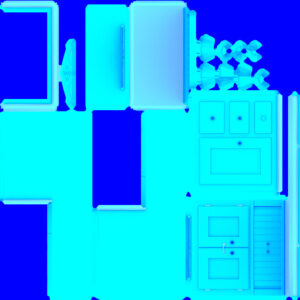
Unlike many tasks, Blender’s powerful but bafflingly-designed texture map baking tools are not improved by its UI-focused fork, Bforartists. Here’s how to use them, with a downloadable example (the Hoosier Cabinet from Lillie is the Keeper‘s upcoming 1.2 release). Click here to download the cabinet model with textures.
Honestly, if I haven’t done it for a while, I can’t remember how the process works, so this will be as much a cheat sheet for me as you.
Since it’s not our focus, we’ll skip quickly through the high-to-low-poly sculpt method. You create a low-polygon model, unwrap its UVs, and make a duplicate (using Duplicate Objects, not Duplicate Linked) in the same world position. Hiding the original, you sculpt a high-detail version, to be baked onto the original as (at minimum) a Normal Map. You can also use Bforartist’s Shading tab to create texture, displacement and color, even applying multiple materials to your high-resolution mesh. Since the UVs don’t have to match between the high and low-poly versions, effects like differently-oriented wood grain are just a matter of mucking with the high-poly sculpt’s UVs.
I’m also largely assuming you’re familiar with importing textures into Unity.
Baking a Normal Map
- In Object Mode, select the high-poly model.
- Multiple-select the low-poly model as well (on Mac, Command-click, in the scene hierarchy window).
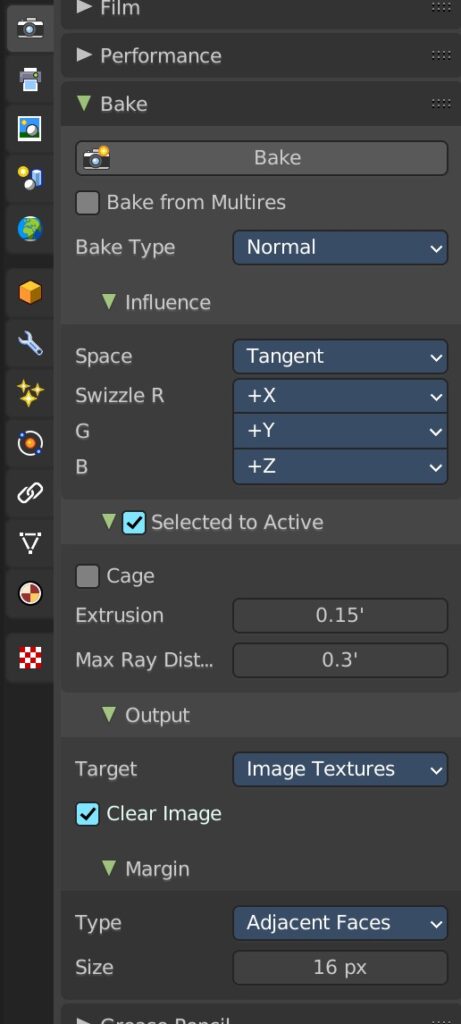
- Under Render Properties (the camera icon in the sidebar) set Render Engine to Cycles. (Baking is not supported in Eevee or Workbench.)
- Farther down in the Render Properties sidebar, click to expand the Bake options.
- Set Bake Type to Normal.
- Check Selected to Active (if it’s not already checked).
- For Extrusion, enter the minimum distance the baking system will need to “puff out” your low-poly model’s surfaces to completely enclose your high-poly sculpt. (This may take a few goes, before you hit on the right distance to catch everything without artifacts.)
- Max Ray Distance I usually set to twice the Extrusion.
- Under Target, select Image Textures.
- (Wait, shouldn’t there be a control here to select which texture to bake to? Yes, but, Blender.)
- So instead, switch from the Main tab to the Shading tab.
- Make sure your low-poly model has a Material of its own.
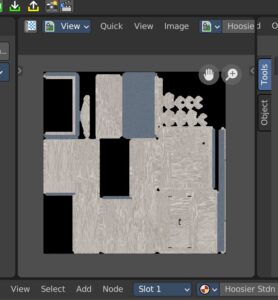
- In the View window, create a new texture (Image menu: New) or open an existing texture to overwrite (Image menu: Open…).
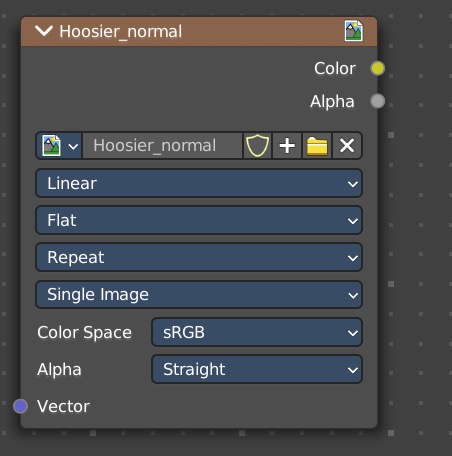
- Down in the texture nodes window, click Add: Texture: Image Texture, and drop the node into your workspace. Don’t bother connecting it to anything.
- In the Image Map node’s Image Browser menu (picture icon) select the Normal Map texture you’ve just created/opened.
- Select the Image Texture node itself. For some reason, this is how you choose which texture to bake to. If an Image Texture node is hilighted in the node workspace, baking will write to it. BE CAREFUL: It’s easy to accidentally bake to the wrong texture, if you’re using texture maps in your Material.
- Back in the sidebar, click that big Bake button.
- If the results are good, save the texture map from the View window. (Image menu: Save Image.)
- If not, play with your Extrusion parameter, and/or your sculpt geometry. Make sure your normals are facing the right way. (The Normal Map baker doesn’t seem to ignore backfaces.)
Baking an Occlusion Map
Ambient Occlusion darkens cracks and crannies in your surface. Most importantly, it keeps the inner edges of your Normal Maps from reflecting a bunch of weird phantom light.
It’s possible to bake Ambient Occlusion (as well as Diffuse and others) from a single model to itself–no high-poly needed. To do this, simply select the model, go to the Bake options and uncheck Selected to Active.
- Follow the same procedure down to Step 5, but now set the Bake Type menu to Ambient Occlusion. If baking high-to-low, keep the same Extrusion and Max Ray Distance settings that worked for your Normal Map.
- Follow the rest of the procedure above. You can reuse the Image Texture node, just make sure to switch it to the Occlusion Map texture you create/open. Remember to save the texture after the bake.
Baking a Diffuse Map
If you’re comfortable with the node-based shader system, and applying multiple materials to a mesh, you can do a lot of interesting texturing in Bforartists.
Typically, you’ll be baking Diffuse maps with a single model, rather than high-poly-to-low. Again, simply select the model, go to the Bake options and uncheck Selected to Active.
- Follow the same procedure down to Step 5, but now set the Bake Type menu to Diffuse.
- Chances are you don’t want to bake your shadows and global illumination into the Diffuse Map. Under Contributions, uncheck Direct and Indirect.
- Follow the rest of the procedure above, with the same reminders.
The Prestige: Baking a MOxS Map
This one’s on Unity. In the Universal Render Pipeline (URP), there’s an awkwardly not-quite documented way to pack three monochromatic textures into one, saving two texture taps per draw (and textures in memory). The four channel (RGBA) texture packs a Metallic Map, Occlusion Map, an unused channel, and a Smoothness Map into one, I guess, “MOxS Map.”
- First we’ll need to bake a Metallic Map. Unfortunately, the Bake Type menu has no such option. We’ll get around this in the Shading node editor by temporarily piping our Metallic value into the Emission input (since it’s the least likely to already be in use) and baking an Emit Map:
- For each Material on the model…
- If there’s a node piped into the Principled BSDF node’s Metallic input, pipe it into the Emission input instead.
- If it’s a constant value, just copy it into the Emission color’s V value (in HSV mode).
- Set the Bake Type to Emit.
- As above, create/open a texture to overwrite with the Metallic Map, select it in the Image Texture node, hilight the node, and click the Bake button. Save the texture.
- Next we need an Occlusion Map. Disconnect/revert any Emission changes you made in your Materials to create the Metallic Map, and bake an Occlusion Map as above.
- Finally, we need a Smoothness Map. We can’t natively bake this either, but we can bake its (literal) inverse:
- Set Bake Type to Roughness.
- Create/open a texture, bake the Roughness Map to it, and save.
- Combine all three textures in Photoshop (as follows) or another image editor:
- Create a new document the same dimensions as your textures.
- Open the Metallic Map texture, Select All, and Copy.
- In the new document, click on the Channels tab, select the Red channel, and Paste.
- Open the Occlusion Map texture, Select All, and Copy.
- In the new document, select the Green channel, and Paste.
- Open the Roughness Map texture, Select All.
- Invert the image (Image menu: Adjustments: Invert) and Copy.
- In your new document, create an Alpha channel (plus-in-a-box icon, at the bottom of the Channels tab).
- Select the Alpha channel, and Paste.
- Save as a Photoshop file. (PNG may try to knock out parts of the image based on the alpha channel, and Unity imports Photoshop files well.)
- In Unity, select the “MOxS” texture. Make sure sRGB (Color Texture) and Alpha is Transparency are unchecked. (This is a data texture, so we don’t want to adjust the colors to the current gamut, especially in a Linear Color Space project.)
- In your Unity Material (using the Lit, or Complex Lit shader) assign your MOxS texture to the Metallic Map input. Leave the Smoothness slider alone, as it won’t affect anything, and make sure Source is set to Metallic Alpha.
- Finally, plug the MOxS map into the Occlusion Map input as well. (The workflow feels off, but the shader seems to recognize the packed green channel as the one to use.)

